I always find it a bit challenging to make a thing I'm not passionate about, I've learned to say no to making things for people when they ask (it tends to be a chore instead of a joy, and I have enough chores) but I do make gifts now and again that might not be exaclty to my tastes.
My boyfriend's mother is visiting later this month and I wanted to make her something... I don't know too much about her preferences, but I've been told she likes frogs. I planned on going the ceramics route and throwing a bowl or mug, digging deep for my inner artist and sculpting a frog to it, but moving got in the way, so I defaulted back to sewing.
Craftsy has lots of affordable patterns, and then there are the free ones, which bring me so much joy! I found a few paper pieced frog patterns online, but I couldn't really beat this one which is free and adorable. The description mentions how the lady found the art in German, and deconstructed it into a pattern. It says intermediate difficulty, but I think if you have any experience with paper piecing you'd find it pretty doable.
I changed the size down to an 8" square, am adding a border, quilting it, and turning it into a box pouch. I haven't done any free motion quilting or made any pouches for over a year so I'm sure I'll have some madcap adventures in seam ripping coming up! I want to put googly eyes on it, but I'm not sure the recipient would find that as amusing as I would. :(
Showing posts with label small projects. Show all posts
Sunday, September 10, 2017
Saturday, September 9, 2017
Fabric Panels for Windows
Aaahhh the sweet smell of privacy.
Did you know you can give yourself privacy with fabric? I'd forgotten. Several years ago I did research for cheap fixes for the lack of drapes in a rental, and found you can put fabric up, with spray starch. And it's cheap! You can even make your own starch if you didn't go a bit bonkers and buy a 3 pack of starch you didn't really need like I did some years ago..
In that rental, I just cut out sheet pieces to size, I'm a bit more upscale this time. Admittedly I don't love my choices. I mixed and matched Liberty of London bits for my front door, and I'll probably change it soon. I'm not exactly a floral print sort of girl.
I just traced the shapes with paper for templates, then cut the fabric out. I sprayed starch on the glass and and the light fabric just stayed right where I put it while I sprayed another heavy mist on top. It's a bit lopsided since it's temporary, but *shrug*.
I thought I'd do a window in the kitchen while I was at it, after I forgot to close the blinds and found myself being surprised by my neighbor pretty nearby in his yard (I was wearing clothes though, phew!) I chose Tula Pink's Birds & Bees Meteor Shower in Cinnamon, but will probably switch to something less opaque soon once my fabric is all unpacked, since I could use as much light as possible in the room I spend so much time in!
Heavier cotton fabric means it's good to spray the window AND douse the fabric with starch before you put it on the glass.
A squeegee can help you work out any air bubbles, and if you're a bit off in your measuring you can carefully use an Exacto knife to trim any excess.
Did you know you can give yourself privacy with fabric? I'd forgotten. Several years ago I did research for cheap fixes for the lack of drapes in a rental, and found you can put fabric up, with spray starch. And it's cheap! You can even make your own starch if you didn't go a bit bonkers and buy a 3 pack of starch you didn't really need like I did some years ago..
![]() |
| Tula Pink's Meteor Shower |
I just traced the shapes with paper for templates, then cut the fabric out. I sprayed starch on the glass and and the light fabric just stayed right where I put it while I sprayed another heavy mist on top. It's a bit lopsided since it's temporary, but *shrug*.
I thought I'd do a window in the kitchen while I was at it, after I forgot to close the blinds and found myself being surprised by my neighbor pretty nearby in his yard (I was wearing clothes though, phew!) I chose Tula Pink's Birds & Bees Meteor Shower in Cinnamon, but will probably switch to something less opaque soon once my fabric is all unpacked, since I could use as much light as possible in the room I spend so much time in!
Heavier cotton fabric means it's good to spray the window AND douse the fabric with starch before you put it on the glass.
A squeegee can help you work out any air bubbles, and if you're a bit off in your measuring you can carefully use an Exacto knife to trim any excess.
Thursday, September 11, 2014
Sew Together Bag - Take One

I thought this sew together bag was an awesome looking pattern, and saw a lot of pretty versions of it. I read lots of reviews and tips and it seemed like making two at once was the way to go, to learn, so I had fabrics set aside and partially cut out for when I got around to it. When I had time to sit down and start it and realized I was making them for *peoplewhoarenotme* so I decided to nix those and make one out of fabric I love.
Lo and behold, I had a lot of trouble with doing this. I couldn't chose single fabric to base this on. That sure says something about my stash, huh? I settled on a color scheme - orange and blue. I don't even know how I feel about those colors together, but I have a surprising amount of orange and blue fabrics so... why not?
I followed the sewalong tutorial which was helpful - especially how it was broken down into five days so you weren't overwhelmed.I'd read reviews that made it seem stressful, but besides one area where it was a bit unclear what you were supposed to do, this helped a ton. I'll say the directions themselves were minimal IMO, and would've benefited greatly from picture or drawings about what the hell you were supposed to do. This is why I always try to read a few reviews of a pattern before buying it - or waiting for a sew along.
Note: I also found this website to be a great tutorial for sewing the bag together, Cassandra has a great set of photos to walk you through making it. I read a HELL of a lot of walk throughs before I settled on switching between this and the sewalong.
Surprisingly, I admit, this was kind of fun to make. I liked watching it come together and comparing it to other people's as they put it together. I put a pincushion on one side, and a felt piece for needles the other. Directions on the pattern are nonexistent for this so yay for the internet!
Here is the bad thing.. I have NO need for this bag. My travel crafts are embroidery and hand sewing, and I already have more useful bags for this, including ones that fit a hoop or two. That said, I should be able to jigger it so it has less pouches but is taller, with a bit of *math* I happen to suck at math, but I love the idea of having a couple zippered pouches for various projects instead of fishing floss bobbins out from a tangle. I'll figure out that damn math sooner or later!
Monday, August 11, 2014
Ahhh..fabricking and soaping
My mysterious fabric for my sisters quilt was found, it was PURE - STOF of Denmark - Burst Stripe in Purple and Grey. It was found because Julie of The Intrepid Thread is awesome and when she couldn't ID it she put up a post about it, where it was recognized, and some total stranger named Anita in California happened to have some that she just up and mailed to me because *sniffle* people who sew are awesome.
This is where I tell anybody who ever wanders across this post that my ongoing review of her store is like.. BUY FROM HER. Anita sent a total stranger some fabric because she thinks Julie is awesome and is also presumably really nice. Julie is giving Anita some fabric because Anita was nice to me. I am going to win the lottery so I can buy more fabric, and hopefully come up with something nice to do back for Anita.

This gave me an excuse to buy more fabric from her, and I have been excited about Indelible and I'm always short on green and low volume so there ya go. As always shipping was fast, customer service was excellent, and FYI, they enclose a couple charm squares with each order, usually fabrics I haven't considered, and I love adding them to my stack of charm squares and pulling them out as needed for patchwork.
I also started making soap this last weekend because I really do want to learn a new skill or two a year. This is getting wordy enough that I'll put most of it in a new post. I just realized this might be hereditary from my mother. I remember her making macrame, embroidery, sewing clothes and quilts, making candles, canning, making jewelry...
This is where I tell anybody who ever wanders across this post that my ongoing review of her store is like.. BUY FROM HER. Anita sent a total stranger some fabric because she thinks Julie is awesome and is also presumably really nice. Julie is giving Anita some fabric because Anita was nice to me. I am going to win the lottery so I can buy more fabric, and hopefully come up with something nice to do back for Anita.
This gave me an excuse to buy more fabric from her, and I have been excited about Indelible and I'm always short on green and low volume so there ya go. As always shipping was fast, customer service was excellent, and FYI, they enclose a couple charm squares with each order, usually fabrics I haven't considered, and I love adding them to my stack of charm squares and pulling them out as needed for patchwork.
I also started making soap this last weekend because I really do want to learn a new skill or two a year. This is getting wordy enough that I'll put most of it in a new post. I just realized this might be hereditary from my mother. I remember her making macrame, embroidery, sewing clothes and quilts, making candles, canning, making jewelry...
Friday, March 14, 2014
The Ellie Bag
I've been sewing, but also having a nice busy life. Well, that and I'm on my third round of antibiotics for strep this year, as well as suffering through some colds and 24 hour viruses gotten from some evil children! Anyway, I'm going to focus on the fact that I'm busy with fun stuff so haven't been writing.
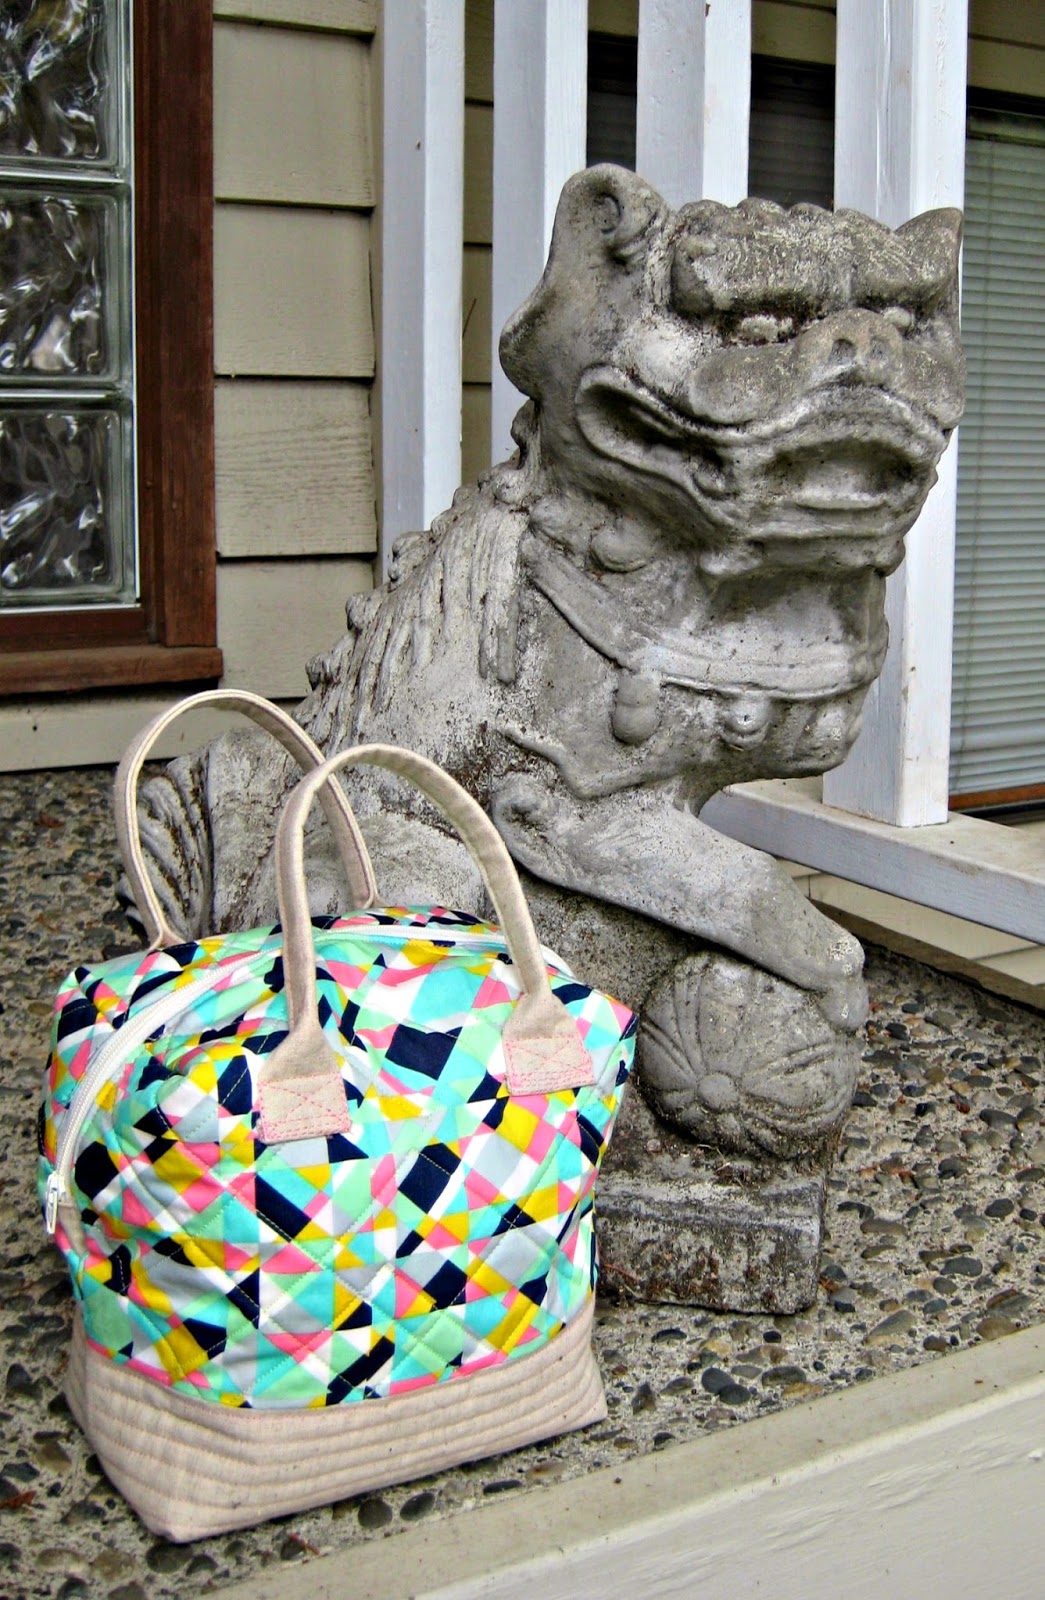
Awhile back I saw and pinned this cute bag tutorial, the Ellie travel case tutorial from over at Fabric Mutt. I took a day to sit down and make it because I ...need more bags? The tutorial is pretty fabulous. Thanks to my practice making the Aeroplane bag from Sew Sweetness I had better success with sewing a zipper in this way, and added an interior zippered pocket.
I used two prints from Pat Bravo's Carnaby St collection, Go Go London in Powdery for the exterior and Psychedelia in Gold for the lining. I also used Essex linen in Ivory for the exterior and handle. The only real problem I had is that I SUCK at attaching handles without ending up with lots of extra sewing. I don't know how people make them look so neat and tidy, and maybe I wouldn't be so aware of it if I hadn't used pink aurifil for it ;)
This was a fun bag to make, and I'm going to make another too. I actually used enough batting and interfacing so that is stands up and holds its shape, I guess there is a first time for everything!
Linking up to SewJo Saturday at My Go-Go Life.
Awhile back I saw and pinned this cute bag tutorial, the Ellie travel case tutorial from over at Fabric Mutt. I took a day to sit down and make it because I ...need more bags? The tutorial is pretty fabulous. Thanks to my practice making the Aeroplane bag from Sew Sweetness I had better success with sewing a zipper in this way, and added an interior zippered pocket.
I used two prints from Pat Bravo's Carnaby St collection, Go Go London in Powdery for the exterior and Psychedelia in Gold for the lining. I also used Essex linen in Ivory for the exterior and handle. The only real problem I had is that I SUCK at attaching handles without ending up with lots of extra sewing. I don't know how people make them look so neat and tidy, and maybe I wouldn't be so aware of it if I hadn't used pink aurifil for it ;)This was a fun bag to make, and I'm going to make another too. I actually used enough batting and interfacing so that is stands up and holds its shape, I guess there is a first time for everything!
Linking up to SewJo Saturday at My Go-Go Life.
Saturday, December 7, 2013
Sew Sweetness Greenbacks Wallet
![]() |
| What a BIG photo!!! |
I'll be working on improving my sewing skills in 2014 so I can make higher quality items, things that have little to no chance of falling apart in the same calendar year, things that people will say "No way, you made that? Compared to the crap you turned out last year, that's fantastic!"
Cough.. OK, no really, I'm just waiting for a compliment on something I've made. It's been two years, and that was clothing, so I'm waiting for that craft sewing flattery.
![]() |
| cell phone holder on back of wallet |
I wasn't quite sure what size it was going to be, I figured it'd be similar to the clutch I made from the patchwork pencil pouch tutorial at LBG studio. What? The tutorial specifies on the first page that it will be 5" by 7"? I just didn't read the directions until now because I'm lazy, but Bam! Her tutorials are complete, so if you're not lazy like me you'll be very happy!
The fabric is from timber & leaf by Sarah Watts. I'd coveted Fawn in Birch Blue print and missed out on the last of it. Hawthorne threads finagled some bolts that turned up in the manufacturer's warehouse, and I luckily saw their FB post about it, and ordered these three prints.
![]() |
| Interior of wallet |
Deviation - I altered the pattern. I have a spiffy pouch I put all my seldom used cards in, it's the only "madebysomebodyelse" item I didn't throw out like yesterday's trash once I realized I could make my own shit, and I love it. Therefore no need for that many credit card holders in the wallet. Luckily making lots of zippered bag in the last year came in handy, and I just add a zippered bag onto one side.
The only problems I ran across were 1. when sewing the credit card area into three slots it didn't work - I needed just a wee bit more room (was wondering if I'd needed to add a seam allowance but that didn't seem to be the case). Instead I divided it into two, resulting in 6 slots. 2. I had trouble following the directions for the wrist strap, and although it's not a direct result, I feel it's too long - a few inches longer than I'd like, too long to feel secure if I'm carrying it solo in public.With a zip pouch on the other side (and I HIGHLY recommend doing this, I feel kick ass - not only do I have a place to stash change and bills - who am I kidding? I don't carry cash since debit cards were born.. but there's room behind the pouch to stash a small notepad or your checkbook) this pattern ticks a lot of my wallet needs. I'll throw it in my purse because it feels stealable despite the wrist band, but I'm pretty happy with it. Damn urban living!
Wednesday, December 4, 2013
Winter Anybody? That & A Mini Quilt
I'm linking up my winter fabric choices for Ali's (yes it IS the best name ever isn't it?) winter Stash Flash. My husband and I take turns decorating the tree each year, during my years its a tasteful (;) blend of silver, turquoise, green and purple, and his years it's that plus whatever will stick to the tree. It doesn't help that we give each other ornaments each year, and while I usually receive something pretty & feathery, I keep giving him things with tentacles that just don't really coordinate well with anything...
That said, my idea of winter mainly combines the limey greens I love with the classic red I associate with the holidays. In my bundle are lots of prints that make me think of ornaments, stars & wrapping paper. That koi print? yeah yeah, it just includes two of the colors I find Christmasy, AND every winter I worry about fish in ponds freezing to death. Mmmhmm. You have until the end of the month to link up!
I also finished binding a mini quilt I'd been working on. I was looking for a pattern that would work large scale, and though it would be fun to start making test minis to try them out. This block pattern was from EQ5, and I made it with 2" squares that ended as 1.5" squares. The end product is just under 12.5" square. I am just amazed as many points line up as do! This just won't work for what I had in mind, however my machine pedal has been slipping all over the place and I put this down today between it and the carpet, and it's keeping it in place so I'm pretty content!
That said, my idea of winter mainly combines the limey greens I love with the classic red I associate with the holidays. In my bundle are lots of prints that make me think of ornaments, stars & wrapping paper. That koi print? yeah yeah, it just includes two of the colors I find Christmasy, AND every winter I worry about fish in ponds freezing to death. Mmmhmm. You have until the end of the month to link up!
I also finished binding a mini quilt I'd been working on. I was looking for a pattern that would work large scale, and though it would be fun to start making test minis to try them out. This block pattern was from EQ5, and I made it with 2" squares that ended as 1.5" squares. The end product is just under 12.5" square. I am just amazed as many points line up as do! This just won't work for what I had in mind, however my machine pedal has been slipping all over the place and I put this down today between it and the carpet, and it's keeping it in place so I'm pretty content!
Tuesday, October 8, 2013
Zakka Along 2.0 - Prettified Pincushion & Pink Castle Purchases
Now that I'm embroidering and sewing all over the place, I never seem to have enough pincushions around. Like scissors and boxes of kleenex, I like to have at least one in each room. This was what I was looking forward most to making from the Patchwork Please going on for the Zakka Along 2.0 with Debbie at A Quilter's Table.Essex Linen? Check. Cute little pictures to put on all four quadrants? Check. Adorable fabric colored button made with my own little hands? Check.
Not too much to say about this, it wasn't too hard to put together ( cause I did it messily), I've realized I'm not great at fussy cutting and I still haven't got the hang of doing neat corners in projects like this, especially seeing others pincushions. It's larger than I thought it would be, and it's stuffed with poly-fil. Pins go into the loosely stuff linen very nicely too, so win for me!
I'm sorry the sew along has come to a close, and I'll probably be going back to make a couple of projects I missed during the busy weeks of moving. An awesome bonus is that I won the prizes in a drawing last week from Debbie - Aurifil and Pelleon swatches and some fabric!
![]() |
| warm scrap bundle from Pink Castle |
Because there's not enough pictures here for my liking, I'll share these too. I just got my order from Pink Castle which included a warm scrap bundle and because I'm a nosy bastard, a small scrap vomit bundle. I'm happy with the variety of the scrap bundle, and I'll just stare at the scrap vomit for awhile until I can make sense of it ;)
![]() |
| Scrap Vomit bundle from Pink Castle |
Monday, September 9, 2013
Zakka Along - Vintage Pencil Case
Time to try my hand at another project from the Zakka Along at A Quilter's Table using the Patchwork Please book. Why? I dont KNOW! I don't need a pencil case, but it was adorable.I found the little paper piecing bits to be easier than I thought it's be, but I managed to botch the purple pencil seam allowance and not catch it until it was too late. I used Essex Linen in chocolate for the body of the purse, and the back is Blue and Yellow Apples by Yuwa
Ok, yes I find it ironic that I can't fit a #2 pencil with eraser inside the case, perhaps they used nubbier pencils back in the day ;)Amy did a beautiful version with solids, I might just make a second one and add an extra inch onto it so I can fit full sized pencils, I think this one is becoming my travel pouch for colored pencils that I take with me when I embroider, since I've been incorporating a lot more of that into my time.
Wednesday, September 4, 2013
Zakka Along - Triangle Patchwork Box Pouch
Time to try my hand at another project from the Zakka Along at A Quilter's Table using the Patchwork Please book. Ugh, this one had so many WORDS, words I just wasn't parsing. I got stuck at one point but thanks to the write ups other people had done so far was able to get through that part. it's a bit uneven, and I feel like the lining could've been a bit more fitted, but it's done, and becoming a travel bag, since I've been *gasp* using one that I didn't make.
I decided to use blues, reds and pinks, three colors I never really use, but as I'm making a blue and red EPP pillow I thought I'd continue the theme. I think I'm hoping I'll learn to love some of my less favorite colors if I have them around more.
I cut out some fabric bits before remembering that it needed to be a mirror image for paper piecing, so I reversed the two panels on one side so the bits wouldn't go to waste.
Would I make this again? Yes, and I will, but I'll probably do patchwork panels, and I think I'd make an more or less exact copy of the outer shell for the lining, so it would fit perfectly. Uh... and I'll take more care to make sure my corners are all where they should be (best tips I found for assembly were from Alyce)
I decided to use blues, reds and pinks, three colors I never really use, but as I'm making a blue and red EPP pillow I thought I'd continue the theme. I think I'm hoping I'll learn to love some of my less favorite colors if I have them around more.
I cut out some fabric bits before remembering that it needed to be a mirror image for paper piecing, so I reversed the two panels on one side so the bits wouldn't go to waste.
Would I make this again? Yes, and I will, but I'll probably do patchwork panels, and I think I'd make an more or less exact copy of the outer shell for the lining, so it would fit perfectly. Uh... and I'll take more care to make sure my corners are all where they should be (best tips I found for assembly were from Alyce)
Monday, August 19, 2013
Zakka Along - Happy Hexagon Trivet
Ok, my sewing room in the new place is all up and running, and I actually have time to sew for the Zakka Along 2.0!
I decided to go with a center and back of Summersville - Brush Strokes in Seafoam, and solids from my scrap bins. I figure there's a chance the person I made a laundry hamper out of Summersville might end up needing a trivet any moment now, and if I can make his house look ridiculously matchy, I'm not sure why I wouldn't try it ;)
This was an easy project, and I think I'll make a second one for me in Kaffe Fassett shot cottons. My machine managed to suck it up and sew through all the fabric and the batting and insulated layers. This might be the tidiest binding I have put on a project to date too!
I decided to go with a center and back of Summersville - Brush Strokes in Seafoam, and solids from my scrap bins. I figure there's a chance the person I made a laundry hamper out of Summersville might end up needing a trivet any moment now, and if I can make his house look ridiculously matchy, I'm not sure why I wouldn't try it ;)This was an easy project, and I think I'll make a second one for me in Kaffe Fassett shot cottons. My machine managed to suck it up and sew through all the fabric and the batting and insulated layers. This might be the tidiest binding I have put on a project to date too!
Saturday, August 3, 2013
Zakka scrappy box - first after move project!
After all the moving labor of the last two weeks I realized that I haven't sewn at all, not even made time for embroidery.
I'd planned on doing the Zakka Along 2.0 - Patchwork, Please sew along, and really wanted to do the scrappy box - of course I'd put the book aside so I could sew along during the move but it managed to get itself packed anyway, dammit. I finally found it, and got my patchwork sides put together for this project and then found that I wasn't able to make any sense of the directions
![]() |
| First thing organized of course! |
What I was going to use as chipboard was still at my old house, and my firmest interfacing was still pretty floppy sadly, but here in all it's totally incorrect glory is my scrappy zakka box! This sew along is the only thing I'll be working on in the near future - my feed dogs stopped working again & I'm using my backup. Time to google the nearest local UPS to ship it off to be fixed so I can finish my king sized quilt!
Bright side is my sewing machine (the living room of the new place) is nearly set up, I just need more time to use it!
Wednesday, June 12, 2013
Picasso Mickey Mini
When Ellison Lane posted about the 2013 Modern Mini Quilt Challenge, I got excited - I missed the one last year and I mean...mini? Hell yes, it means I won't be working on something for months. And don't look at me that way...my husband looked at it and said it looked like a Picasso Mickey Mouse, and since it's a Minnie challenge (YES I JUST MADE A CRAPPY PUN) and I'm sure not going to ever come up with names for anything I make..I'm going with it.
My inspiration came from this lovely building. I considering recreating it in the form it is, with squares and rectangles. However, I've been making lots of english paper pieced hexies for an ongoing lap quilt, and I thought I'd try my hand at making something with EPP hexagaons, trapezoids, diamonds and triangles.I used a variety of Kona and Kaffe Fasset shot cotton solids for the "building", Riley Blake shaded cotton in slate for the background and Essex linen in Steel for the binding. I went a LOT liberal with my color choices because frankly, I didn't have anything quite right.
I've got to figure out how to securely fold/tuck under the seam allowance around the edges when I do EPP, I had a bit of trouble at a couple corners. Of course one of the lovely blogs I follow posted some great tips about the subject right after I finished and I can't
find the link to it. Something to do with those mini irons.Accuracy is something I don't seem capable of, there was a lot of seam ripping along the way and a few more things I should've redone. If I didn't know better I'd think I'd been drinking and sewing around some of those triangular corners!
Nevertheless it's weird and not what I had in my head at ALL, and I'm OK with that! It's a good reminder to take things slower and put projects down for a day or two so I can look at them with fresh eyes and fix anything that needs to be fixed. This mini quilt finished at an "almost-square" 11 inches. And again I didn't leave myself a way to hang it ;)
![]() |
| back |
Tuesday, April 30, 2013
Small things
I worked on a couple small things last week, since I needed a break from staring at but NOT working on the king sized quilt I managed to botch up and have to rip apart and trim and resew...First was a fabric ball for a lovely six year old who said she wanted a ball after getting a look at my hexy paper piecing kit. I figured she wont have high craftsmanship standards so I was not worried about her being too dissatisfied with whatever the end product was ;)
She picked out fabrics from the kit to use (do I have to admit I'd sewn some of it together before I realized you need at least SOME pentagons to make a ball fit together?) so I decided to do all pentagons instead and cut the same prints in the new appropriate shape.I used this tutorial, but decided to paper piece (since the whole idea came up after a discussion of paper piecing). I think machine sewn would've been nicer looking or at least using pink or purple thread, but I used Gutermann specifically made for hand quilting that I've been using for all my paper piecing.
It actually bounces, I'm impressed!
Next was a pencil pouch with the tutorial from Little Big Girl Studio. It had a slightly different take on putting together the pouch than I've used before, and was easy to follow with great pics. For this I used Essex linen and prints from Art Gallery's Indian Summer. It was near impossible to cut 2.5" squares for the patchwork, I wanted to include MORE of the prints not less!
It was the perfect size to use as a clutch for an event over the weekend, fit keys, ID, phone & lip gloss :)
Friday, April 26, 2013
Finished Triangles Pillow
![]() |
| Seriously is it not obvious I love my pillow? |
Oooh I love something I made, and the fact that I did my own template for it makes me a happy campter. That wasn't so bad, a lot of juggling trying to make sure it was mostly color balanced, and trying to keep straight what pieces went where since I didn't number anything.I'm trying to experiment with all the different types of closures I can find, so I opted for an envelope closure pillow cover. I followed the tutorial at i'm a ginger monkey.
Headliner News from Blank Textiles
Joel Dewberry Modern Meadow Fabric - Herringbone
Kona in some blue that I have a ton of ;)
I machine quilted it with Aurifil, just some abstracty-ish straight line quilting. And YES, I did choose my text print placement carefully to include thunderous and cockpit. :| I have the sense of humor of a teenage boy, after all.
Monday, March 25, 2013
Fractured Quilt Finished
It's not perfect, and I think I put some bits in different spots than I was supposed to, but that's one of the brilliant things about this, you can't really go wrong and I still love it! Pretty sure I sewed some stuff on upside down ;)I used Gutermann thread to quilt it because thats what I have in colors that match, a pale green and a pale purple. I used white in my bobbin and had trouble getting the tension right for the FMQ so a bit of it is showing through in the darker fabrics, which actually helps since the darkest purple's SO dark.
I was a bit perplexed about how to quilt this, but finally chose the Sunrays pattern from Angela Walter's Free-Motion Quilting book. I even put a sleeve on the back of this for hanging it...but it will probably hang from push pins for awhile yet since I'm too lazy to go into the cold garage and fire up my table saw :D
Friday, March 22, 2013
Kaffe Collective Pillow
I am a super lucky person in all aspects of my life, tis true! I won a mini charm pack of fabrics from the Kaffe Collective at Fabric Fascination's blog. I got my choice of 4 different color schemes, and opted for the hot, maybe because it's winter maybe because I love shiny bright things, I'm not sure. I LOVE Kaffe, especially my bathrobe I made with a millefore print of his.I was trying to figure out just what to do with 2.5" squares for a quilt, but gave up and went to my pinterest pillow board and found a couple patterns I loved and wanted to try and decided to go with that instead, I have a goal of making every single pillow in the world by the end of the year, after all!
![]() |
| Inspiration pillows |
The other side is a HST with a twist pillow pattern from the Plum and June blog.
Is there NOTHING half square triangles cant accomplish?!??! I think not!
Making half square triangles out of 2.5 inch squares is a bit tedious, I admit. I didn't spend excessive time worrying about trimming and lining things up perfectly on the front. Machine stitched both sides with some pale yellow Aurifil.Do I need to admit the one side looks better the further away you stand from it? Shhh, I like to do that and pretend I'm on a tropical holiday. I DO think the first side is a wee bit ugly close up, and I don't care :D One more pillow accomplished!
(seriously I need to start taking things outside to photograph them in daylight, eh?)
Subscribe to:
Posts (Atom)